I have wanted a folding Polaroid Land Camera with a manual shutter since I bought by first Land Camera and found out just how simple the metering system was, and how easy it was to unintentionally fool it.
Polaroid themselves did make several manual shutter models, but they are rare and expensive. So, I started to research how easy it would be to convert the automatic electronics that control the shutter to manual. That's when I found out that someone had already done this and put their results on their website. http://www.chemie.unibas.ch/~holder/shutterpic/index.html
The information was pretty much all there, I just needed to fill in a few gaps and source the parts. I had recently converted my Polaroid 320 to a
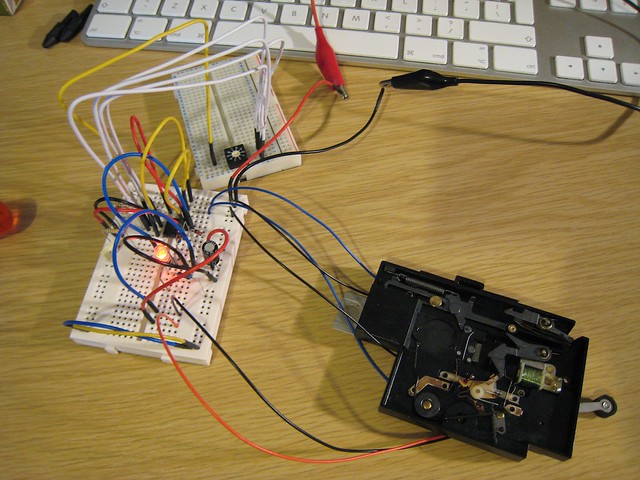
Polga (Polaroid / Holga hybrid) and one of the parts removed from the Polaroid for the conversion was the shutter. So I started to mock up the replacement electronics on breadboard and connected it to the shutter.
I had changed a few components that were specifically mentioned on the website and also made best guess estimates at the values of a couple that weren't. To my surprise, everything worked first time. :)
After some further testing, I noticed that there was a problem. It looks like the shutter I was using behaved differently than the one that the original designer had used. Specifically one of the switches that I was connecting to was fluttering as you prime the shutter and this was confusing the PIC. I also found that it was possible to accidentally open the shutter if you do not fully cock the shutter correctly, thereby exposing the film. (This happens towards the end of the video below).
These were minor problem though, as I wasn't going to be using this shutter on the final camera - a Polaroid 350. However, it did mean that I needed to do further testing on a shutter more similar to the one found on my target camera. This was when I remembered that I had a broken Polaroid 340. From what I could tell the 340 was the plastic version of the 350. The problem with the 340 was that the electronics didn't work. This was perfect as I would be removing them anyway.
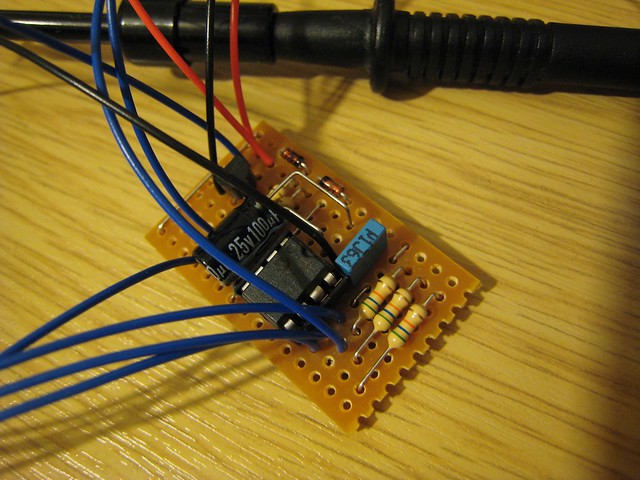
So I could keep my (working) reference design, I decided to keep the breadboard version intact and build another version of the circuit using veroboard (stripboard). Most of the components were cheap, I had bought extra.
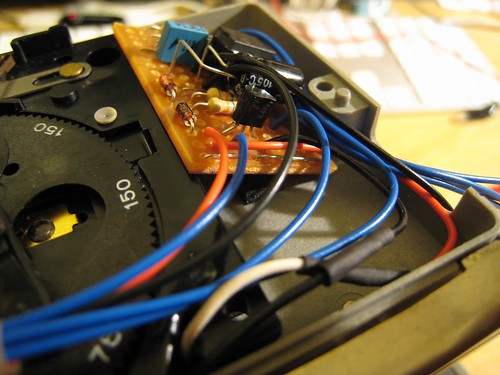
I converted the camera to 2x AAA batteries, and then installed my new shutter electronics. It would seem that somewhere alone the line my measurements for the maximum size of the veroboard had changed. My board was a little bit too big. Luckily, it would still fit if I put it in the space diagonally. Noted for next time...
I had a weird problem to begin with - the circuit that was drawing a maximum of 40mA on the bench, was drawing over an amp when it was installed in the camera. Other than that it was still working as expected. I disconnected the power quickly and took the camera apart again. I couldn't find any sign of a short, and the enclosure it was mounted in was plastic (so non conductive). I wrapped the circuit in a couple of layers of packing tape and put it all back together. Everything worked as expected then.
So here's the video of the shutter working with the new electronics. I go through each shutter speed from slowest to fastest and then bulb. Enjoy.